Floral Chandelier: How to Make Your Own
The past few days I’ve noticed a new pep in my step and I know without a doubt it’s because the grass is green, the trees are budding, my lilac bushes are blooming, and the Earth is bursting with life. Oh how I love this time of year! Truly. The death of winter is over. Finally! To bring a little of that sweet springtime cheer inside, I made a floral chandelier a couple weeks ago and I’m going to show you how easy it is to make your own.
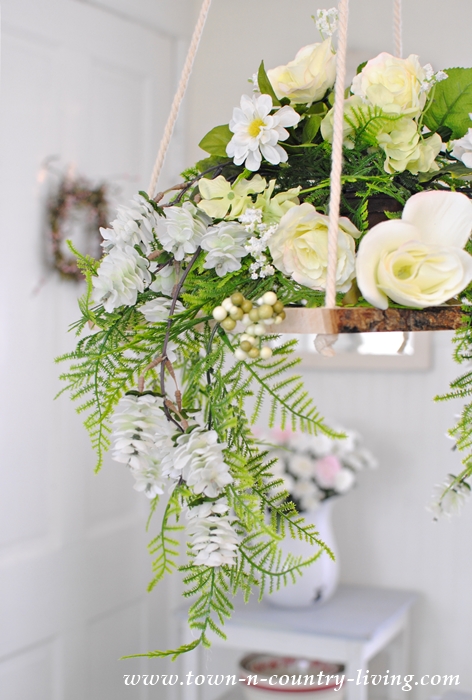
For my floral chandelier, I used silk flowers. But once my flower garden outside is matured, I’ll swap out the silk with real flowers.
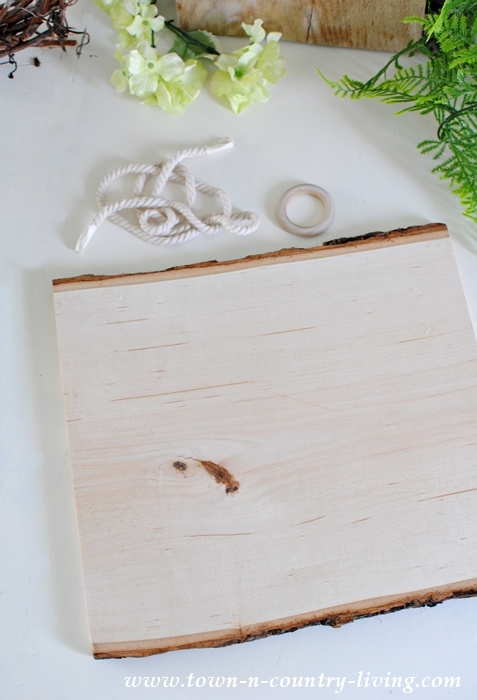
It starts with a birch wood slice. You can find these in craft stores; they come in a variety of sizes and you can choose a square, circle, or rectangle.
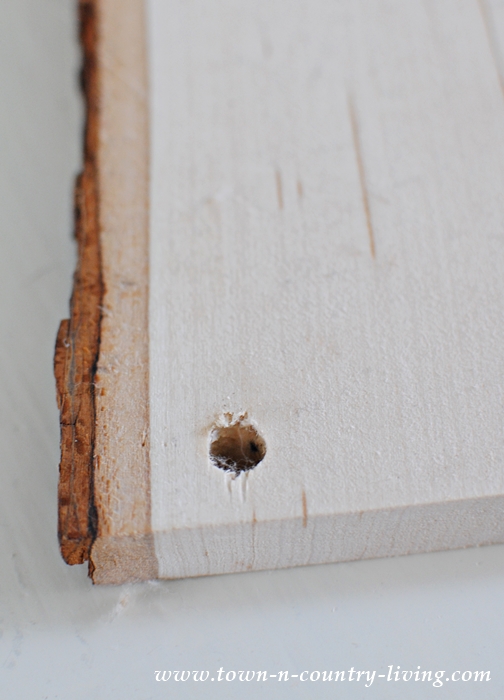
Drill small holes in each corner of your slice. If you’re using a circular shape of wood, simple drill the holes equal distance apart. The hole should be big enough for your rope or twine to fit through.
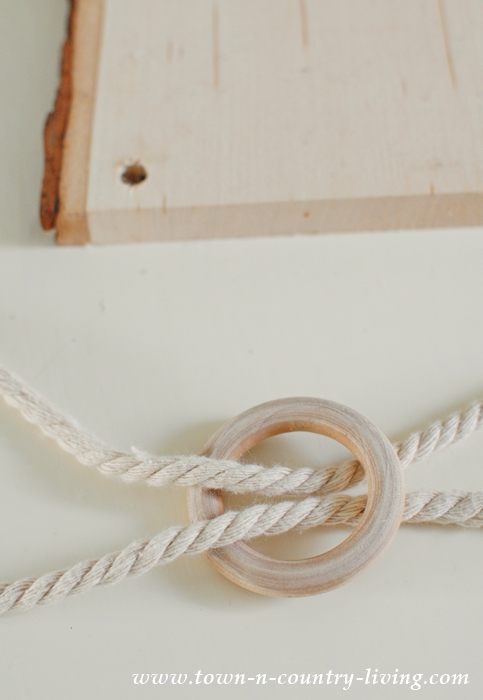
Measure the distance from your ceiling hook to the level where you want your chandelier to hang. Add a couple inches to tie knots on the end. Cut your 2 pieces of rope and feed them through a wooden ring. By using a ring, you can easily adjust the wood slice after hanging if it’s crooked.
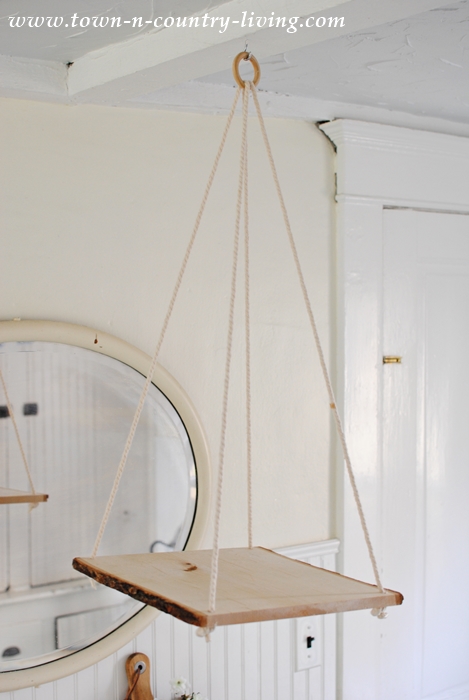
Feed each end of rope through the holes and tie the ends in a big knot. Hang the wooden ring on a ceiling hook. The rope will slide through the wooden ring so if one side is hanging higher, you can easily adjust it and make the wood base of the chandelier level.
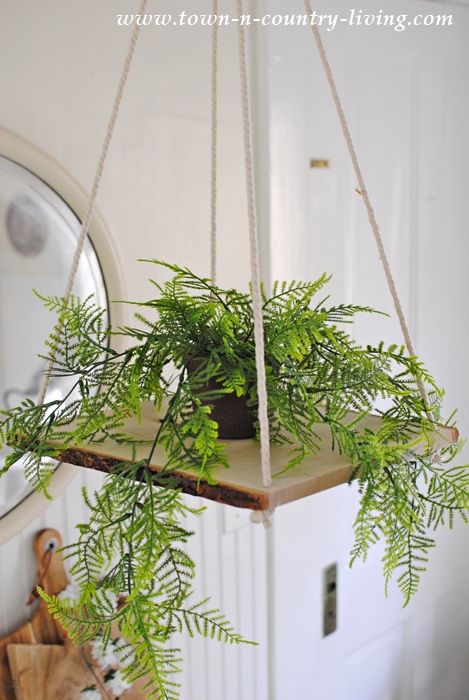
For the base of my flower arrangement, I chose a plant with vines to spill over the edges. You can use either a real or faux plant.
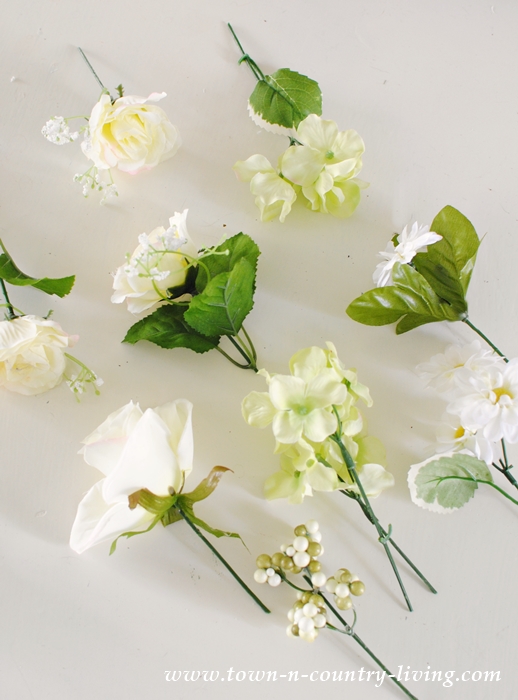
Now comes the fun part of adding silk flowers. In the summer, I’ll use real flowers from my garden, putting them in small floral water tubes filled with water. I chose a white and green theme for my floral chandelier.

The first flowers I added were sprays of flowery vines to cascade over the edges.

Then I added the single flower stems, piling some on top for height, and poking in the rest to break up the greenery. It doesn’t have to be perfect. Look at flowers in nature … they’re never grouped perfectly.
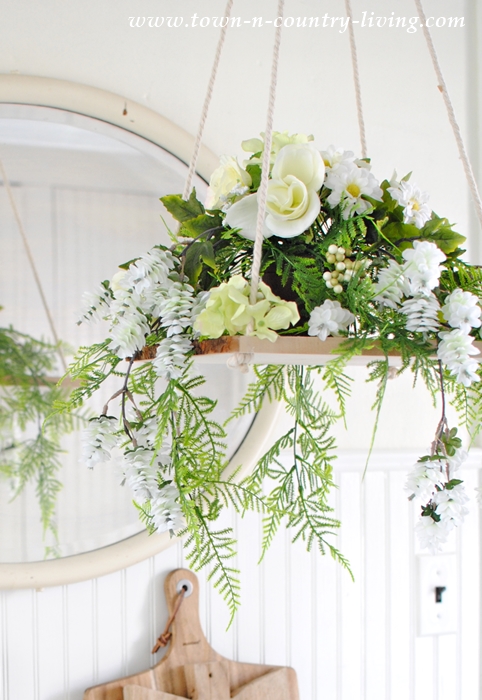
Step back from time to time as you’re working to make sure it looks right from all sides.
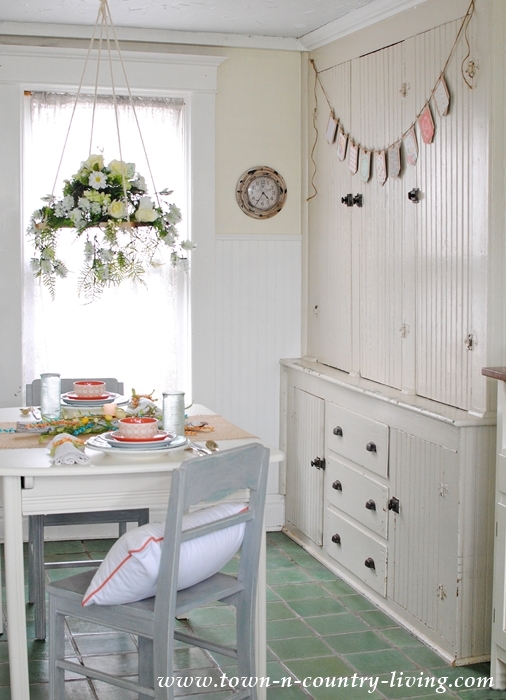
I hung my chandelier in my breakfast nook that’s decorated for spring. I’m looking forward to changing the arrangement of my floral chandelier over the summer months. I’m going to incorporate candles too … but that’s a blog post for another day!


What a cute idea, looks so pretty in your house !
Favorite post ever!!! I used to do weddings and did large versions of this. But never thought about doing a smaller one for every day use at home. You could use the silk greenery all the time and change out the top flowers with fresh! LOVE THIS! Thanks for the great inspiration . Now I just need the snow to stop in Colorado….
Jenniver, that flower chandelier is gorgeous. I love it!
Wow! That’s cool!
I LOVE this so much! x
That’s a rather beautiful idea!!