How to Paint Pine Cones
Pine cones are a great decorating resource because you can find them for free on the ground!
The only problem is, they’re always brown. So I thought, why not paint them?
You can easily customize pine cones with the paint color of your choice.
This post shows you how to paint pine cones … it’s so very easy!
 Once your pine cones are painted and dried, pair them with other objects in a wooden bowl.
In no time you’ll have a pretty centerpiece or the makings of a simple vignette.
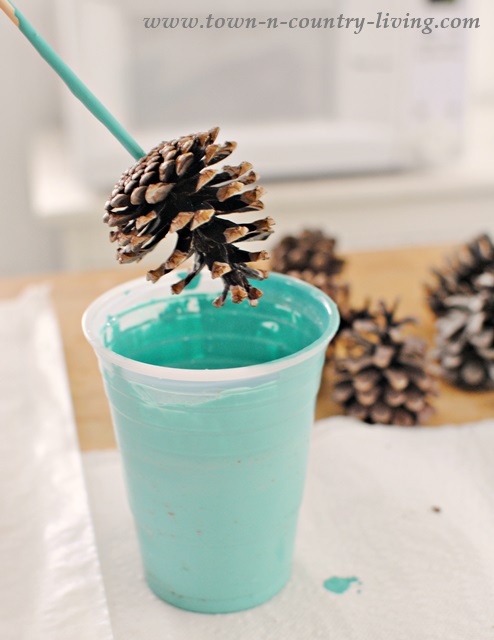 I used two different colors – turquoise and white. You can use acrylic or even interior house paint.
I twisted the pointed end of a bamboo skewer into the bottom of the pine cone.
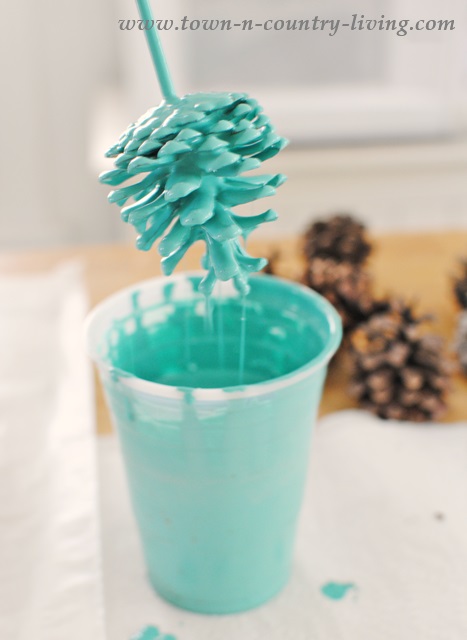 The paint mixture is 3 parts paint and 2 parts water. Simply dunk the pine cone into the paint.
Remove it and shake off as much excess paint off the pine cone as you can.
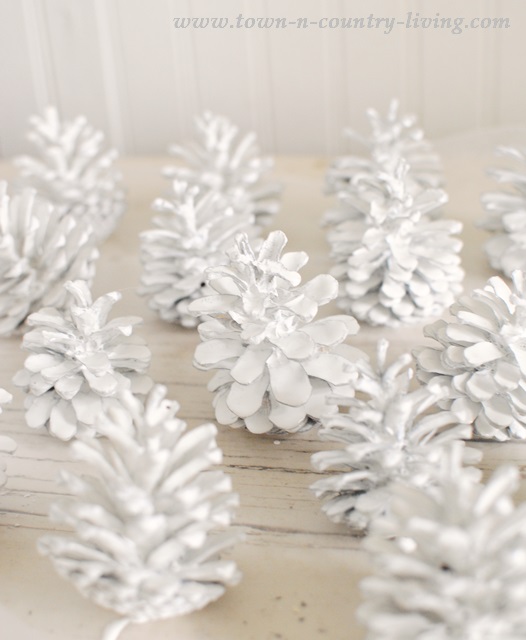 Set the pine cones out on waxed paper to dry overnight. The pine cones will probably close up.
Whenever they get wet they tend to close, but don’t fear! You can force them back open.
Set your oven to its lowest temperature and place pine cones on a baking sheet on the center shelf.
Check the pine cones about every 30 minutes and once they’ve opened, remove them from the oven.
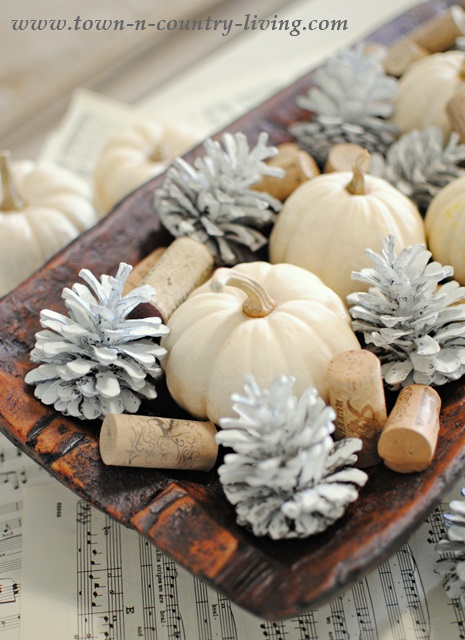
 I thought the white painted pine cones would look cute paired with Baby Boos.
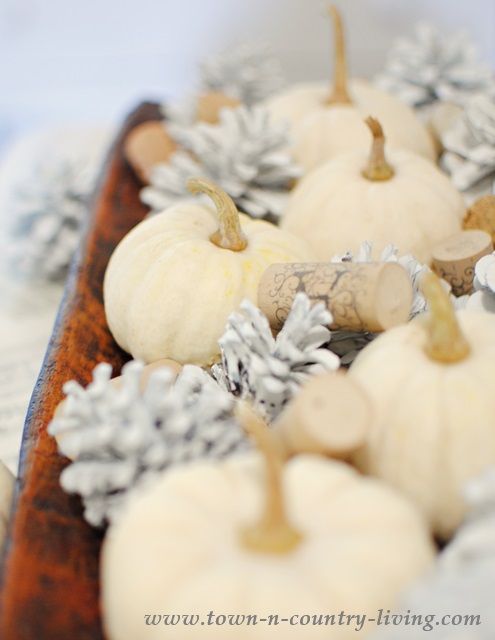 I piled them all into my wooden dough bowl for a Fall centerpiece.
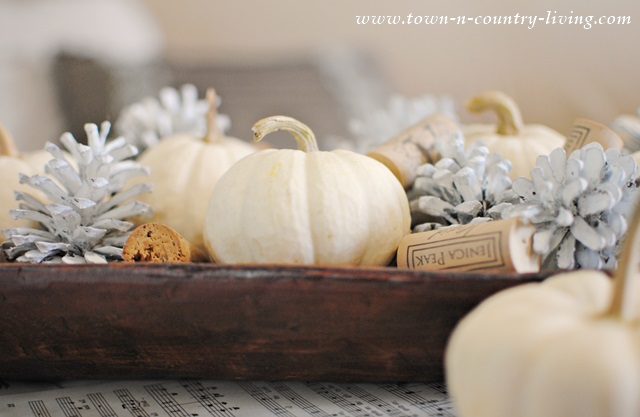 I threw in a few wine corks for good measure.
The Jenica Peak cork is from a bottle of Merlot, which is a very good red wine!
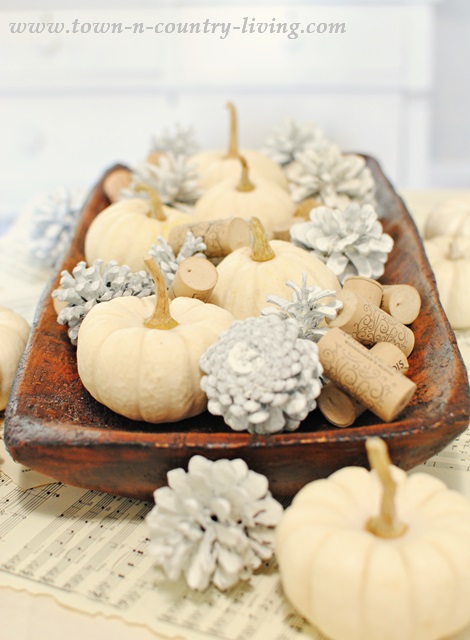 I love the creamy color of the Baby Boos paired with the white of the pine cones.
And that’s how to paint pine cones … simply dunk and dry!
You Might Also Like …
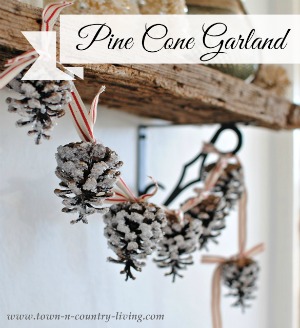
 DIY Fall Wreath


Wow these are absolutely stunning! Great job I may need to try these in the winter. Time to go foraging for pine cones!
Great tip on getting them to open again! I’ve painted pine cones before and didn’t realize I could get them to open up again. Thanks for the tip.
Great idea and I love the tip! I think I might be trying this!
I would never of thought of the skewer, clever! The pint cone garland is so darling. Thanx for the inspiration.
XX Jo, from Anne’s Attic – design blog http://fulcolbaxia.wordpress.com
Such a smart idea! Would work for Xmas too. It’s raining here today but tomorrow I’m going to look for some of my neighbor’s pine cones (they fall into our yard). =)
Jeanine
I love your dough bowl with the pretty pinecones. Thanks for sharing the how to.
Hugs,
FABBY
I love the way they look…love the way you filled your dough bowl too!
Really pretty Jennifer! And I love the big wooden bowl you’ve arranged everything in!
Sally
Great idea! What kind of paint did you use?
I’d like to know the type of paint. Thanks, Ruth.
I have the same question, what kind of paint did you use? Thanks fr sharing.
Lollie
Perfect and beautiful! What kind of paint did you use?.. And brand? Thank you!!
What kind of paint did you use. And wouldn’t that be kind of expensive with all the colors
Great idea! What kind of paint did you use? What brand? Thanks 🙂
I painted mine with acrylic paint with a brush took me 45 minutes to do one large one. Course there was no brown on it when I was done. They stayed open and the paint I used was those $.59 cents to $.89 cents Folk Art Michael’s Smart Paints Walmart is the .59 cent one. I had to do 33 of them for floral arrangements, I used two med size pine cones and then added a Feathered bird from the Dollar Store some green grass a silky butterfly some baby’s breath and a 3-4 inch piece of Ivy and then placed them in a pretty glass bowl. You can also add a 3-4 inch piece of Faux Ivy. I arranged all in a pretty glass bowl presented them to friends that have done me favors .
I made a card which said “Here’s a touch of Spring ” Just because I like you Used a Rubber stamp with one of Dina Wakelys
funny birds on it..I sure could have saved some time I used turquoise, Yellow, pink and Lavender to paint the cones.
What is the name brand of the paint?
WHAT KIND OF PAINT DID YOU USE……PLEASE????
she said acrylic, any brand, Michaels, Folk art, apple barrel, and acrylic comes in satin, matte, gloss, all colors. Easier to clean, because its water based
Beautiful,
Hi what type of paint should I use as I’m new to using pine cones. Recently moved house out of the city & have a pine tree in my garden & 2 more right beside my house
I would just use acrylic paints. Easiest to water down if you choose. Plus so many colors to choose from and mix if you want
Thank you for sharing the tutorial! I saw friends in comment section recommended acrylic paint, gonna give it a try.
U can also sprinkle a little glitter on them while the paint is wet an voila ……they sparkle!!!!. I loved the post about arranging them in glass bowls for a gift. Get them at estate sales for pennies add greenery that I get at Christmas tree lots free and a few red berries (pepper berry works great) beautiful arrangement for a hostess gift,
why can’t you just spray paint them?
There’s too much waste when you use spray paint, because of the overspray . 👍
You can spray paint. We spray a base coat of white primer, then you can paint any color you want and they cover beautifully. If you add mini bottle lights to your arrangement you can make an attractive center piece.
You can but it’s cheaper to use the acrylic paints. Plus you can mix colors.
l like spray paint, it is a lot easier, but the acrylic paints come in so many pretty colors.
Did you have to wash or brush clean first? Thanks, Debbie.
I used ModPodge Extreme glitter over painted colors and the glitter is beautiful and does not come off!
You most definitely need to bake them in an oven on a low temp (200-300 degree), just until they all open nicely and to KILL THE LIL CRITTERS inside of them.
Thank you so much! Ive been spraying my cones or painting with a brush by hand. I will now try this method. I appreciate the detailed tutorial.
Hi , I am having great fun creating pinecone wreaths but have run into a problem. After I have painted and dried then sprayed with a satin polyurethane they will continue to open and have to be touched up 1-2 times. Do you have any tips ?
Thanks
Cheryl
Great project and thx for the tip about reopening the cones! I may make a bunch for Christmas and thought how they would look if I dip the ends in some gold paint the ex gave me. I’m so excited to try and if I do I will post a pic! Happy crafting
Hi, just want to make sure I understand one part. I can put the pinecones in the oven to reopen them AFTER I have used house paint and they have dried? The house paint isn’t full of fumes or flammable once dry right?
I was wondering the same thing grandma Lisa.
I find baby pinecones in late summer. I love the tiny ones. Put 30-40 cones in oven on 2-250 for about half hour. Quick dash to restroom & when I came back the oven was smoking. So I have black cones. I like being different! I put them EVERYWHERE…jars, baskets, around decorations.. you name it. What a wonderful adorable trinket God gave us to enjoy from the mighty pine tree.
I make pinecone flowers and i spray paint mine. This way they do not close up. I use wire coat hangers for my stems that i cut and grind the tips of the wires to a point then i take a small tourch and heat up the wire until red. I take my cut pinecones that look like flowers after cut and put the hot wire into the bottom. It carterizes it and no need for glue. Now i have a stem that i can hold the flower and spray paint them.