How to Make a Whimsical Outdoor Pumpkin Tower
This past weekend I did a thing. I created a pair of totally adorable pumpkin towers in front of my house. Well, I think they’re adorable anyway. And I shouldn’t say that I created them all by myself because hubby helped and got me started. We made two towers of pumpkins that were super easy to construct and went up pretty fast. So today I’m sharing how to make your own whimsical outdoor pumpkin tower because I think everyone should have one – or two or more!
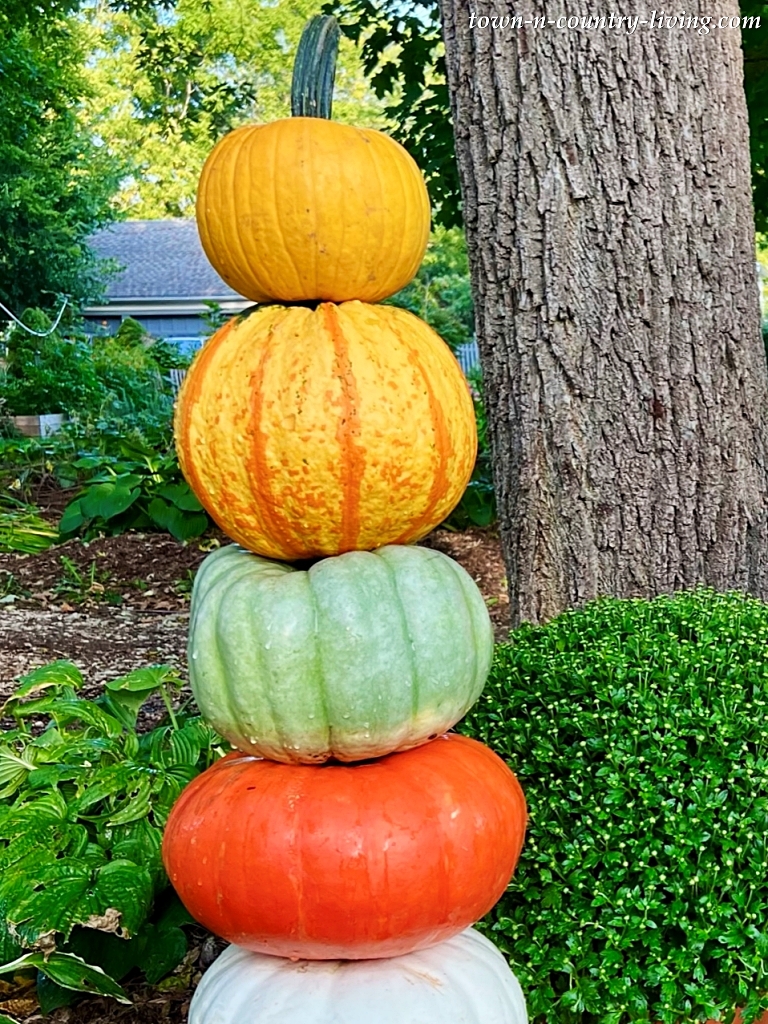
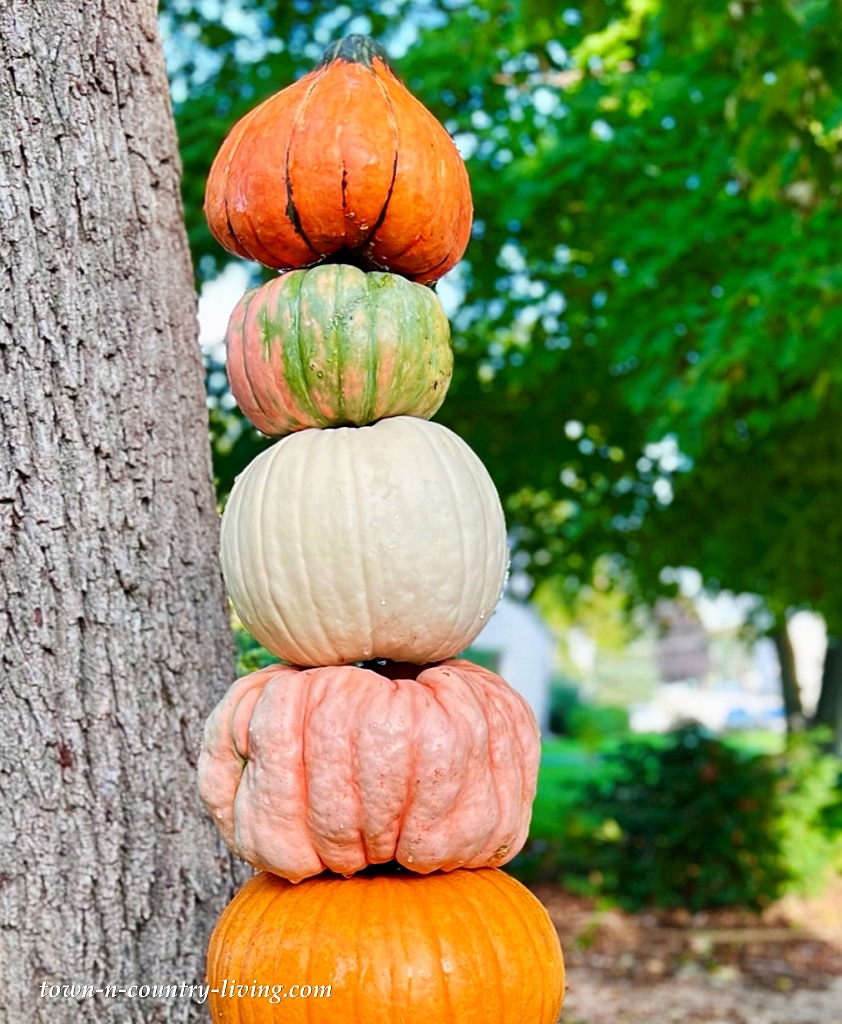
You’ve probably seen two or three pumpkins stacked on top of each other, but what about a six-foot tower of these colorful gourds? We made a 5-foot and 6-foot tower to use as fall decorations in front of our house. We added a couple of gourds and a large mum to complete the display. You could also add haybales and cornstalks.
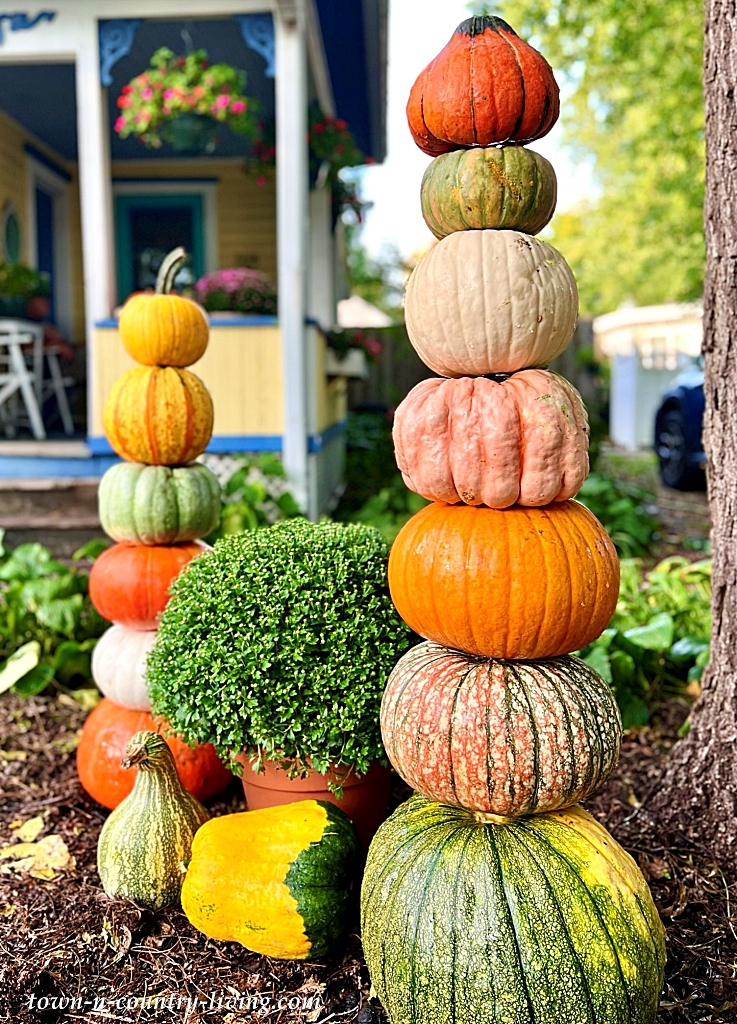
A friend asked me if I attached the pumpkins together or if I simply stacked them and hoped the wind doesn’t knock them over. I’d be more concerned about squirrels causing them to tumble than the wind. Fortunately, the pumpkins are steady because a piece of rebar runs through them and into the ground. They’re not going anywhere!
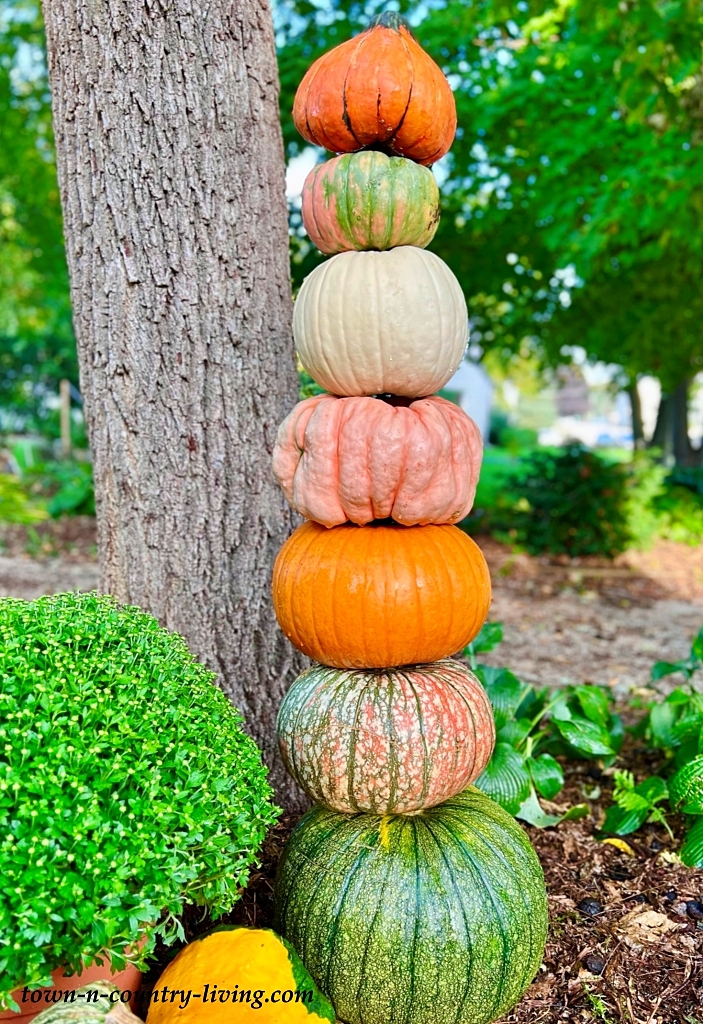
Look carefully and you’ll find that you can’t even see the rebar between the pumpkins, so it looks like they’re balancing precariously on top of each other. I removed the stems off each pumpkin except the top one. To break the stems off quickly, tap the the stems with a hammer. They’ll often come off in one tap. You could also cut the stems off with a small saw.
I spied a charming gourd in the pumpkin patch and thought it would make a cute top. And that’s half the fun of making a pumpkin tower – choosing your pumpkins. Select a range of colors, sizes, and maybe even toss in a warty pumpkin. Lucky for me, I found a roadside pumpkin stand in the country where every pumpkin is $5 regardless of size, shape, or color. This saved me quite a bit of money as large pumpkins sell for around $15 where I live.
Once you have your pumpkins and removed the stems but all from the top pumpkin(s), drill a hole in the top and bottom of the pumpkin and slide it onto the rebar pipe. Because the center of the pumpkins are soft, you don’t need to drill all the way through the pumpkin. You just need to do a bit of maneuvering to line up the top hole once the rebar is through the bottom hole. Detailed instructions are at the end of this post.
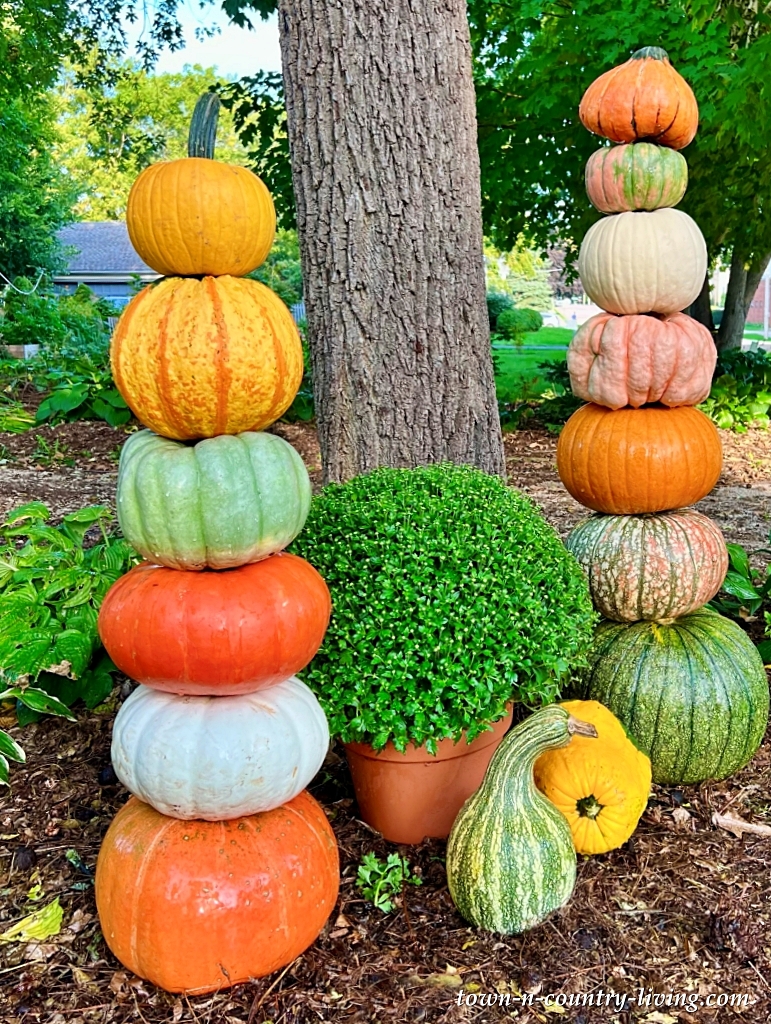
You’ll be surprised at how easy it is to create a pumpkin tower. We purchased a 10-foot piece of rebar and sawed it into two pieces, 5.5′ and 4’5 feet. You can use a sledgehammer to sink the rebar into the ground at least one foot to create stability. If you’re going to make a taller tower, I’d sink the rebar a bit further.
I was thrilled with the way the pumpkin towers turned out. It was a fun and quick project and makes quite a statement piece in front of the house. If any of the pumpkins start to rot, they’re easily replaceable. Next on my list – pumpkin people! Stay tuned for those. I hope to make them this weekend.
Here’s detailed instructions to make your own whimisical tower of pumpkins!

Pumpkin Tower
See how to make a whimsical outdoor pumpkin tower – perfect for fall decorations!
Ingredients
- 1 piece rebar
- pumpkins assorted sizes and colors
- 1 saw
- 1 electric drill
- 1 small hammer
- 1 sledge hammer
Instructions
-
Determine the height of your pumpkin tower. Gather pumpkins, choosing a variety of sizes and colors. Measure the height of the pumpkins to make sure you have enough to accommodate the desired height of your tower.
-
Purchase rebar and cut to the desired height of the tower, adding 12-18 inches that will be set into the ground for stability. So, if you want a 5-foot tower, your rebar will need to be at least 6-feet long.
-
Sink the rebar into the ground. Hit the top of the rebar with a sledgehammer to drill the bar further into the ground, if necessary.
-
Choose the largest pumpkin for your base; it can be round or flatter. Remove the stem by tapping it lightly with a hammer or sawing it off. Sometimes you can pull the stems off by hand.
-
Drill a hole in the middle of the pumpkin, both top and bottom, penetrating through the shell. You don't need to drill all the way through the pumpkin since the center is soft. Use a drill bit that creates a hole as close to the size of the diameter of the rebar. Don't avoid this step. If you try to force the pumpkin onto the rebar without drilling a hole, the pumpkin could crack.
-
Slide the pumpkin onto the rebar and guide the pumpkin to the bottom. You'll be able to spin the pumpkin once it's on the rebar, allowing you to face the pretty side of the pumpkin where it's most likely to be viewed.
-
Continue the process until you've added all pumpkins to your rebar. Try to place the biggest pumpkins on the bottom and the smaller pumpkins at the top, for added stability of your pumpkin tower. For the top pumpkin, leave the stem attached and drill a hole in the bottom only. Slide this pumpkin to the top of your stack to complete the tower.
-
Note: you can place pumpkins on the rebar sideways. If you choose to do this, leave the stem attached and drill a hole on opposite sides of the pumpkin.
as


As I am older I made a permanent pot to use every year for my pumpkin tower, it will hold three pumpkins one for each side of my door and all I need are new pumpkins every year. Need wide short clay flower pot, rebar and concrete. I love these pumpkin towers!
Love this! I was thinking that was pretty expensive to make, but your $5 pumpkins are amazing! Around here (NJ) I have never seen them for that price. They’re sold by the pound. That gets pricey!
Awesome job
AWESOME!🎃🎃
Love the pumpkin tower so much, that I created one here at our home. I have quite a long rebar, pounded at least 12″ into the ground. I figured that instead of removing the rebar, after removing the pumpkins and gourds, I’ll just string it with lights for the Christmas season. Then, once spring arrives, I’ll stack terracotta pots, biggest on the bottom, then going up to smallest, and plant them up.