Seeing Red and Some Photo Tips
No, I’m not mad. The only red I’m seeing is a few pieces of red in the house. In about a month we’ll all be seeing a lot more red with all the holiday decorations that will be flying around the blogosphere. And speaking of blogs, November 5th is my one year blogiversary! Anywho … back to seeing red. The lovely Lucy at Craftberry Bush inspired me to pick up some pomegranates.
Would you believe the first time I ate one of these luscious goodies was just last year?

At first I started drinking Pomegranate juice for the antioxidants, but it’s a bit expensive.
Then I read a tip from Martha Stewart on how to best seed and eat this fruit so I gave it a try.
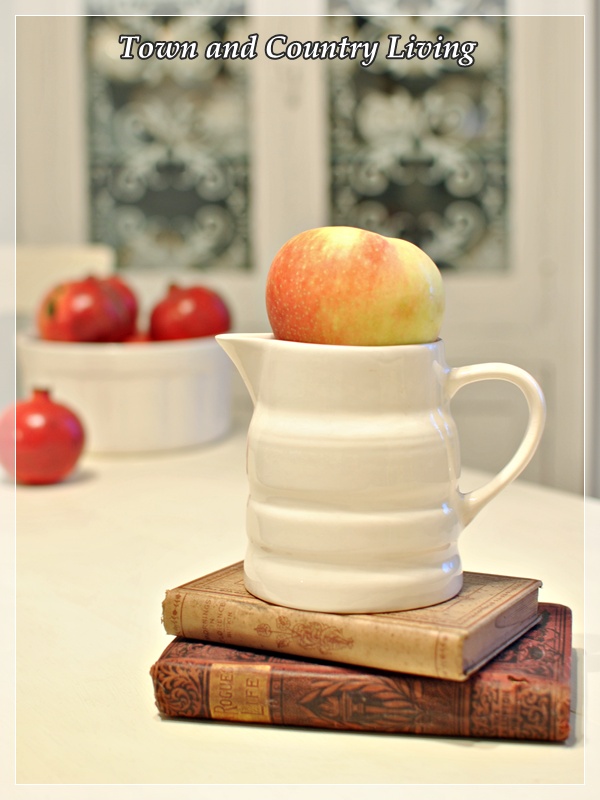
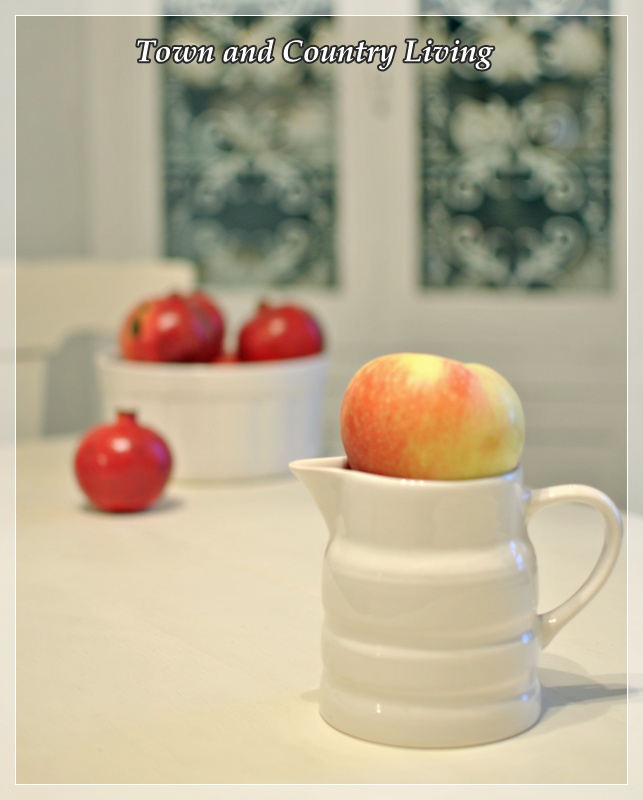
Here’s a Honey Crisp apple nestled in my new Melba Ware ironstone pitcher.
The pitcher was just $6 at this weekend’s flea market. They usually sell for around $15 so I got a bargain.
Now on to a photography tip. I consider myself a novice, but I thought I’d pass along what I’ve learned.
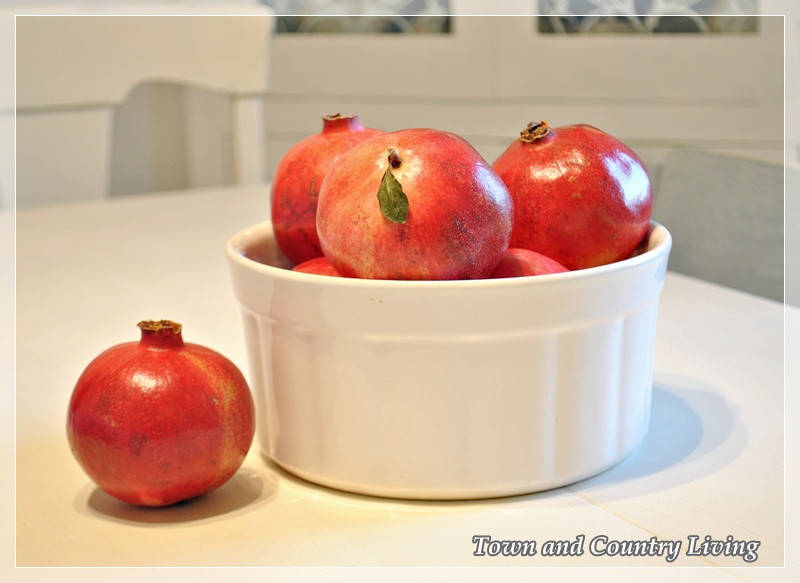
This photo was taken near sunset so the lighting is not natural – this was intentional to prove a point.
It seems like sun is streaming into the room, but it’s not. A few tweaks of the camera and you can fake it.
I took this photo in Manual mode using a Nikon D3000 (what’s known as a DSLR camera).
The settings were an aperture of F5.3 a shutter speed of 1/2.5 and an ISO setting of 100.
What happens when you don’t shoot in Manual mode but use one of the camera’s pre-set options?
This photo is taken using the camera’s Nightscaping setting, which keeps the flash from going off.
You might like this photo, but I prefer my photos lighter and brighter to show off the colors.
So what if I had used a setting that triggers the flash to go off?

Eewwww. I think this is just awful! I never use a flash. Never. Never ever.
A flash isn’t needed for interior shots when you know how to finagle the settings for shooting in manual.
Don’t let shooting in manual mode intimidate you. You just need to learn a little bit about your camera.
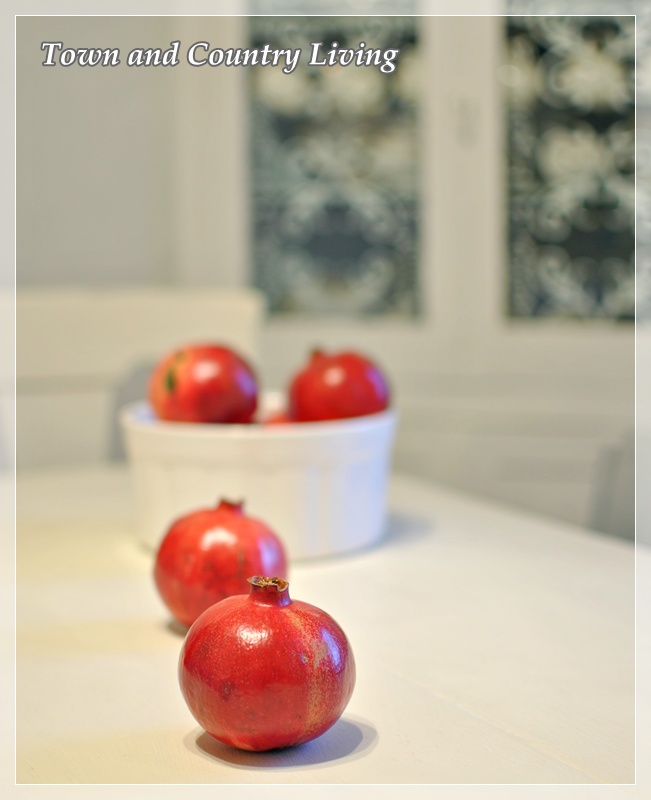
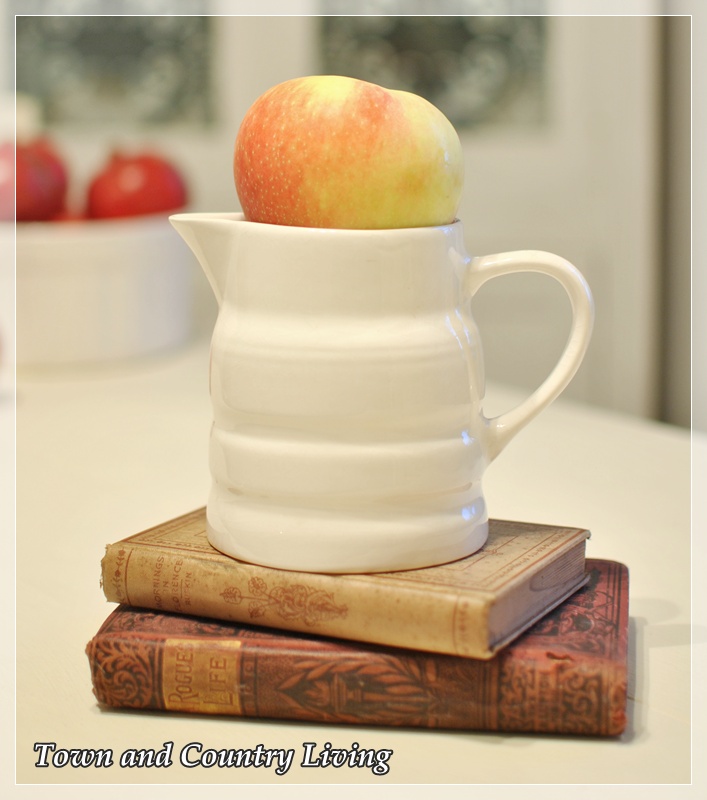
In this photo, I changed to an aperture setting of F1.8, the lowest I could get with my lens.
Aperture refers to depth of field, meaning the area of the photo that’s in focus.
I focused the camera on the pomegranate in the forefront and you can see everything else is blurred.
Think of the aperture setting this way … the lower the number, the smaller the area that will be focused.
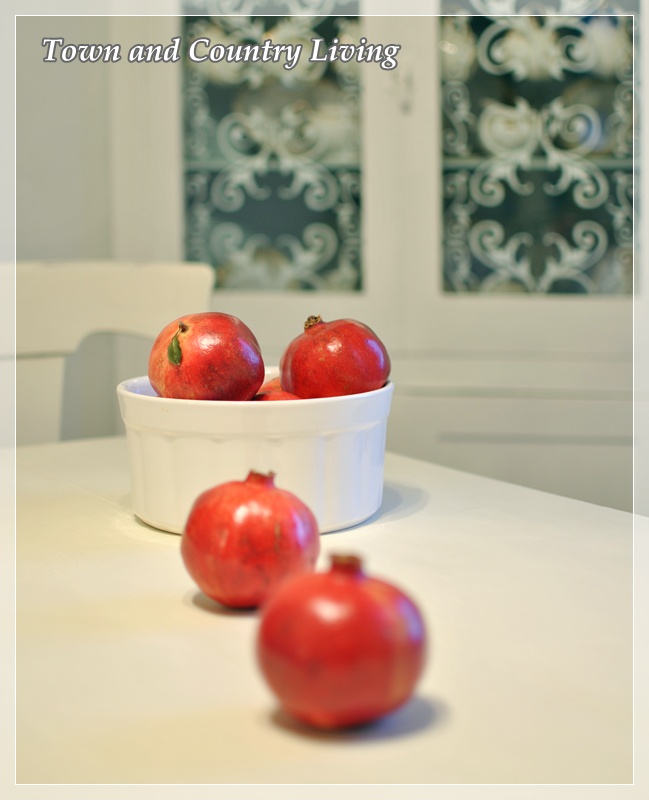
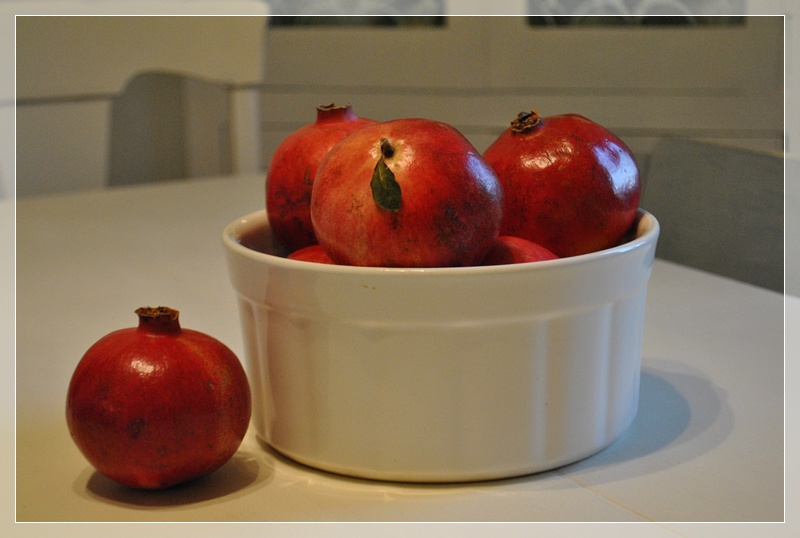
In this photo, the aperture stayed at F1.8 but I focused on the bowl in the background.
You can see that the pomegranate in the foreground is blurry, along with the hutch at the far back.
I always set my aperture setting first and then I set the shutter speed.
I do this because the aperture affects the shutter speed you need.
Sometimes I have to take a couple practice shots before I get the shutter speed right.
For interior shots, I pretty much keep the ISO at 100 or 200 because I want a clean picture.
A higher ISO setting (meaning a bigger number) will make the photo grainy.
Changing the ISO setting will also affect what shutter speed is needed.
Take time to learn about aperture, ISO and shutter speed. You won’t regret it.
I’m still learning but just finding out how those 3 pieces interact made a world of difference.
I used to think I had to wait for a sunny day to take good interior photos, but not anymore.
This photo was taken when it was dark outside. An overhead light was on at the time.
To remove the yellowing affect of the lights, I changed the white balance.
But that’s a post for another day.
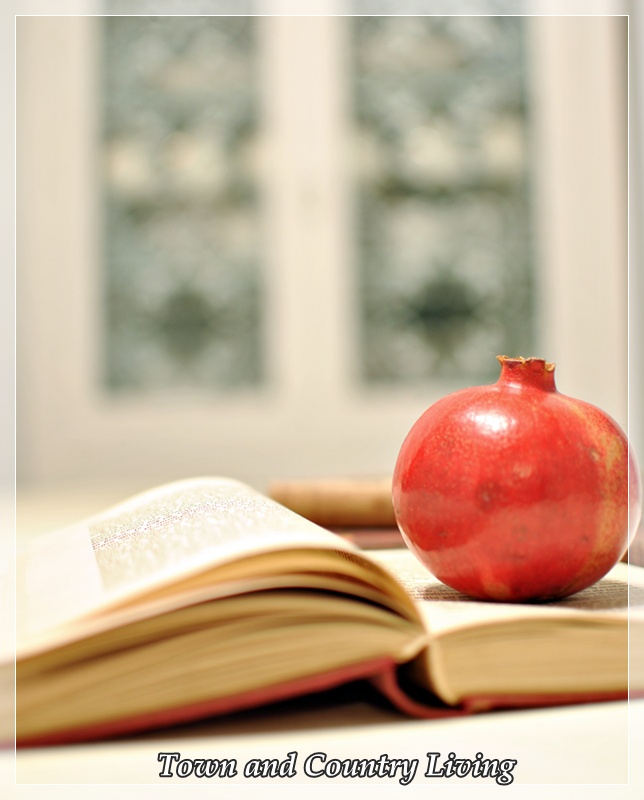
Here’s the video of Martha Stewart showing how to seed a pomegranate:

Congrats to you on your blogging anniversary. Your photos are so awesome. you can tell that your quality of pics has approved . great job keep it up!
Thanks for all of the hints. Will try them.
Judy
Nice. I’ve had my DSLR for about a year now and still can’t bring myself to use the manual mode. Too scared. Thanks for sharing your tips, liz
What is Martha Stewarts tip on eating poms? I haven’t had them for years. More then just the seeds? Juice them? Your pictures are so pretty!
You’ve been studying! I need to spend more time precticing with my new knowledge. I forgot all about white balance! Now I know why my night shots have a yellow cast to them. Thanks for the tips and your photos are looking good!
Beautiful photos! Thanks for the tips,
Jenna
You are learning your camera well. But do tell…. what did you think of the pomegranate when you ate it?
Bliss
Congrats on your Blogversary WOOHOO ! Nice photos . Have a good day !
All of these tips are fabulous – thank you so much for sharing. Gorgeous photos!
Beautiful photos Jennifer! I need to re-read this again! I am still learning with our new camera.And I have so much to learn.Thank you for sharing what you know!
xx
Anne
Congrats on your blogiversary!! You’ve done great this first year and I trust continued success for you in the coming years.
Your photos are beautiful and you passed along some great tips.
Mary Alice
Great tips. Someday, I tell myself, I’ll learn how to do the manual settings.
And fascinating about the pomegranites!
Thanks for these tips, Jennifer! I still struggle with the manual settings. I so badly want to get this down so that it’s second nature and I don’t have to “think” so hard to remember the settings.
Thank you for the video! Interesting. I’ll have to see if a girl at work gets the seeds out this way. Looks easier then the water method.
thanks for the photo tips from one novice to another! 😉
Super video. YOur pictures are stunning. Thanks for joining TTT. Hugs, Marty
Congrats on your one year anniversary!
Hugs,
Susan and Bentley
Well done for year one! And thank you for sharing the photography tips–I will file this away for when I get an SLR camera.
Oooo….love the photo tips …can you believe that my 9 year old son taught me that trick of how to remove the seeds? I was going to share next week …you beat me to it …:( have a great weekend …muah ! Xo
Lu
Oh my goshhh! That is super duper helpful, you have no idea! I have been so made lately because when I get home from work, it’s always dark, so I always wait to take photos till the weekend, now I know I don’t have to do that! UGH! I’ve been suffering too long, and you just changed my life seriously! Lol Thank you so much, I’m gonna have to check out all these settings now.
I too have a DSLR, but it’s still fairly new to me. It’s a Pentax? It was my dad’s, but I want a nikon now because your pictures look so amazing, I thought they were taken during the day, seriously.
Thank you so much for sharing!
I found you from the happy hour link up 🙂
You’re photography is just amazing! You’ve really got it down with how to make your photos look bright but not blown out. I’m going to keep working on that.
~Lynn