How to Make a Pine Cone Garland
I don’t know what it is about garlands, banners, and buntings; but I just love them! Some are fancy and some are plain but each one adds a pretty element to home decor. I’ve been looking at hundreds of Christmas banners on Pinterest and became inspired to create one of my own. So today, I’m sharing how to make a pine cone garland. Mine cost less than $4 to make!
 Since I live in the northern part of the U.S., I opted for frosty looking pine cones.
First thing you need to do is get some pine cones … hopefully for free from your yard or a field.
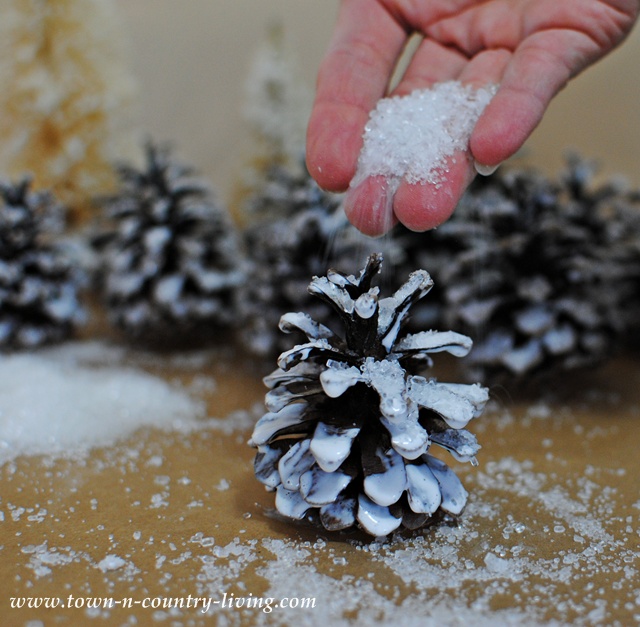 Using a foam brush, I applied a generous amount of Mod Podge to each pine cone. I wanted a heavily frosted look so the pine cones would look as though they’re laden with snow. Apply a heavy dose of Epsom salt. A good deal of it will stick, provided you don’t shake the pine cones until the Mod Podge dries.
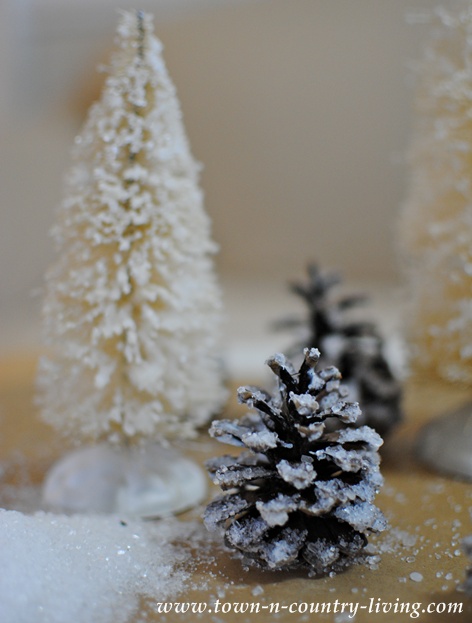 You could stop right here and fill a bowl with these sparkly pretties!
But since this post is about how to make a pine cone garland, we’ll continue.
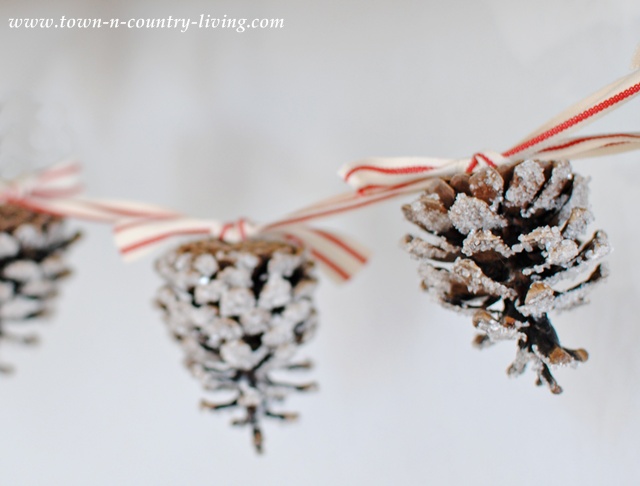 Using a hot glue gun, tack a short strip of ribbon to the base of each pine cone.
 Then tie each frosty pine cone onto a long strip of ribbon to create your garland.
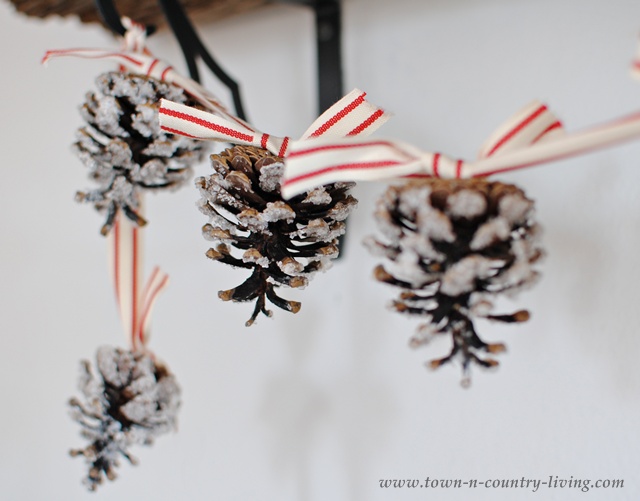
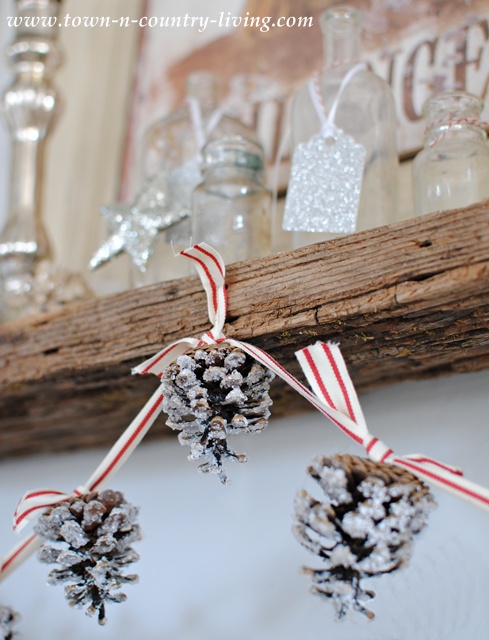 Since you’re tying each cone onto the long ribbon separately, it’s easy to slide the pine cones back and forth on the stretch of ribbon. This way, it’s easy to space them out evenly, which comes in very handy when you hang the garland.
 I found the pine cones outside, and I already had the Epsom salt and Mod Podge on hand.
My only expense was the festive ribbon which was $4 for a fairly big spool of it.
And that’s how to make a pine cone garland! I gave this one to my daughter.

Super Cute…love it!!
Aww so pretty! love that wood shelf too!
This is so sweet, Jennifer. And I have all the ‘ingredients’ to make one. Thanks!
You have beautiful ideas…thanks for sharing…can’t wait to paint!
I love this. This year I am going minimalistic with my decor and this would be perfect.
So Clever! Hubby saved a bunch of pinecones for me last year when cleaning the yard. I was so busy moving in I never got a chance to do anything with them. Oh and that faux mantle is a great idea!
Very cute!! We never get snow in Georgia, so I love this effect on the pinecones. Time to start gathering pinecones outside 😉
A sweet project creating a winter wonderland with nature, glue, glitter and you……Awesome!
I love this and the way you glued the ribbon is brilliant. I think I’m doing this tomorrow…I have the perfect ribbon. Thanks for sharing!
What a sweet little garland, Jennifer! You always come up with the best projects. Thanks for sharing how you made it!
Hi Jennifer,
I love this idea and would like very much to include a link to it, together with one of your pictures, in a pinecone craft blog post I’m sharing later today (Nov. 20). My blog is [email protected] and I’ll ensure your work is properly attributed by linking both to this specific post and to your home page. May I have your permission to include your post?
Thanks for your attention to this request.
I love all of your pine cone projects..my question is: How do you keep the pine cone as straight as you can for xmas trees? After baking them to remove bugs, it seems as if they’re leaning more and not standing straight..
How long should the garlan be?
You are obviously very creative! Love the pinecone garland!