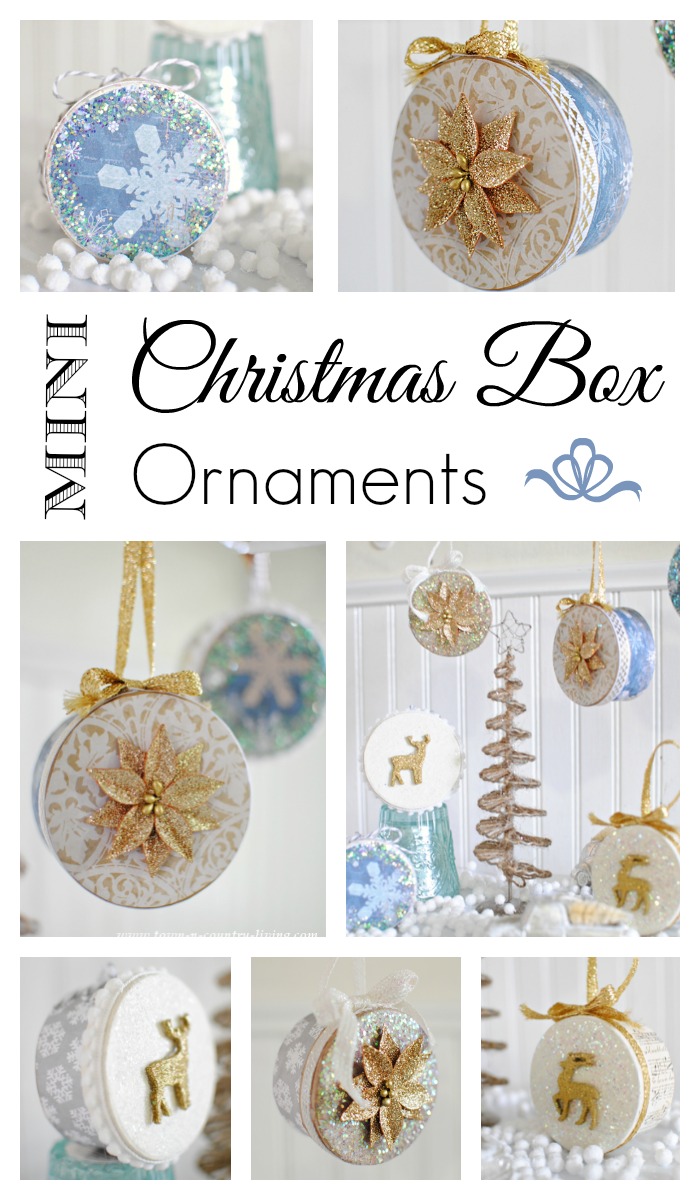
Mini Christmas Box Ornaments: Make Your Own!
This month I’m joining 30 talented bloggers to bring you a handmade Christmas ornament every day. We’ve each chosen a day to feature our ornament, and today it’s my turn. I made a few Mini Christmas Box Ornaments that are super easy and don’t take a lot of time. And when you’re done checking out my ornament, you’ll find the list of all the ornament bloggers at the end so you can check out their holiday craft on their day to post. (This post contains affiliate links.)
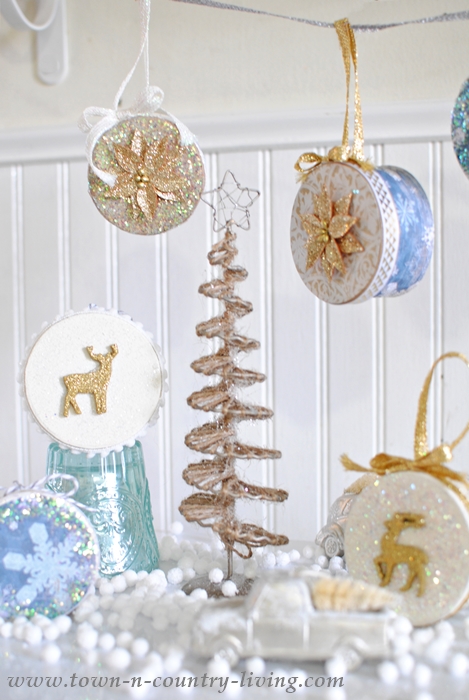
I made a few different varieties and you can customize the Mini Christmas Box Ornaments any way you want.
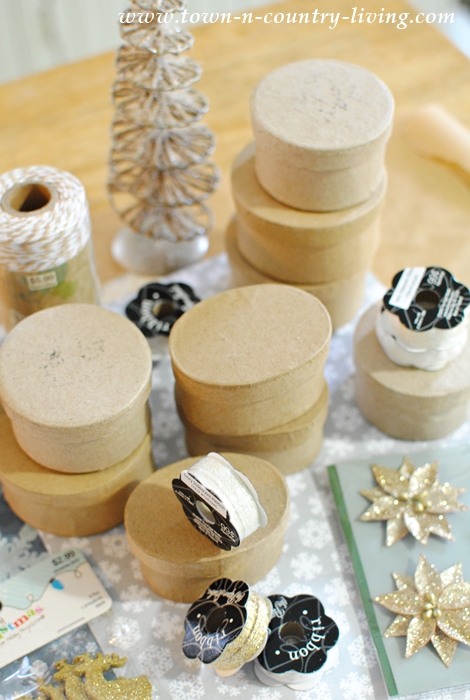
You need just a few supplies.
Small Paper Mache Boxes | Christmas Scrapbook Paper | Glitter
Christmas Ribbon | Christmas Stickers
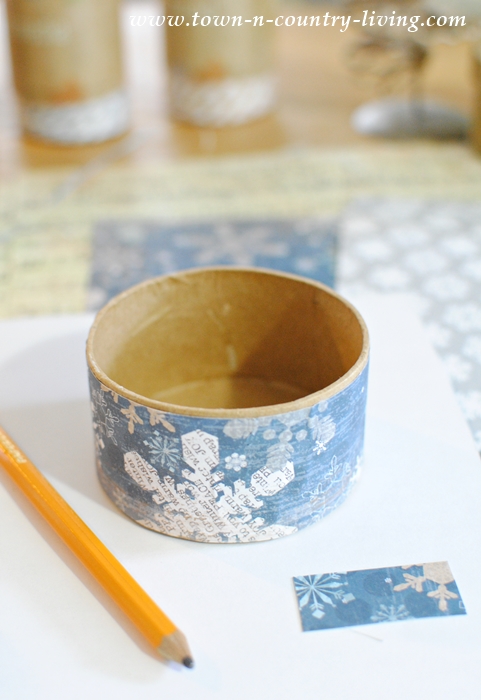
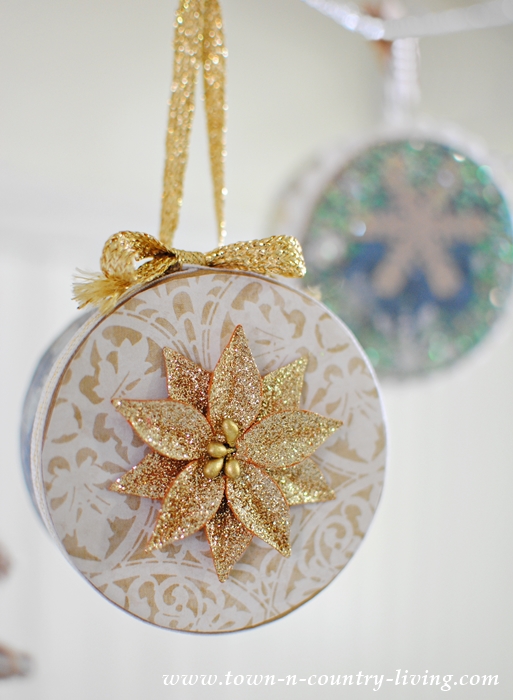
Measure the sides of your box with the lid removed and cut a strip of decorative scrapbook paper to fit. Allow enough length for the ends to slightly overlap. Brush Mod Podge or other type of glue onto the sides of the box and apply the decorative paper, smoothing out air bubbles as needed.
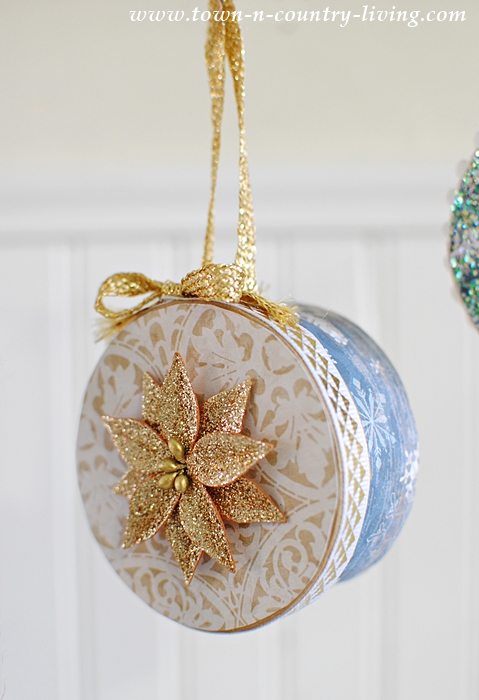
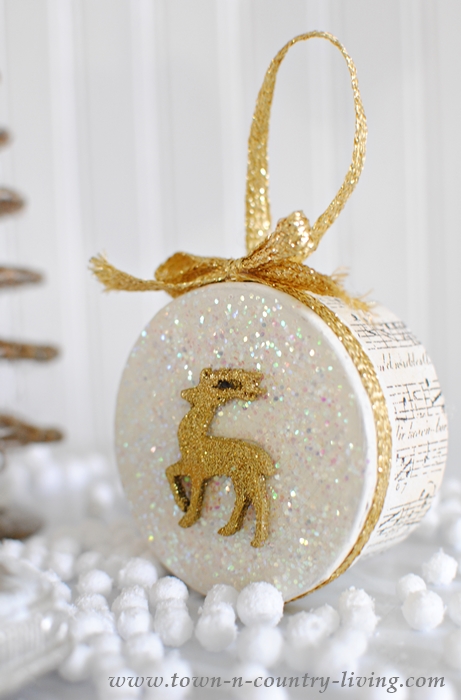
Trace the shape of the lid onto a coordinating paper, cut it out, and apply it to the top of the box lid after brushing glue on the lid. I like to add ribbon around the outside edge of the lid. You can also choose to glue glitter onto the box lid if you want a little bling. Just brush a very thin coat of glue over the top of the paper or along the outer edges of the box top. Sprinkle with glitter and then shake off the excess.
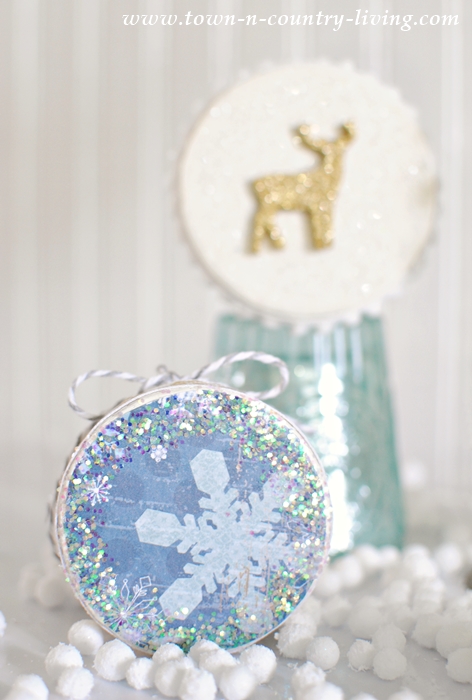
Use baker’s twine or decorative ribbon to create a loop for hanging your Mini Christmas Box Ornaments. I used a hot glue gun to attach the loop to the paper mache box.
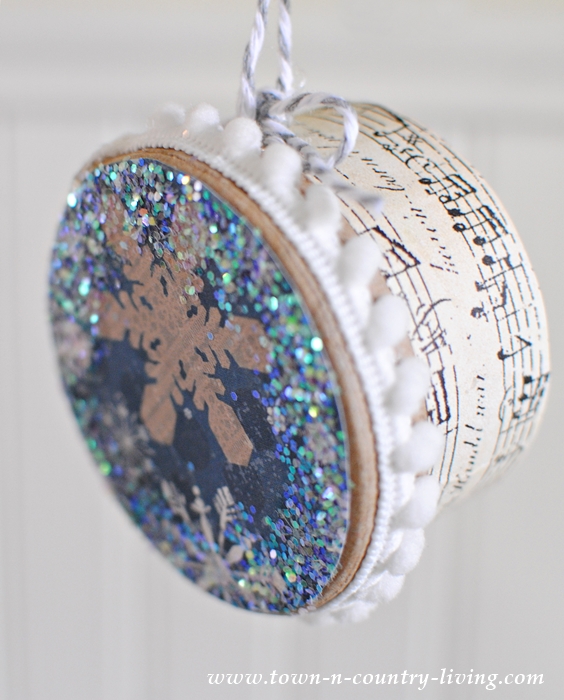
I also tied a small bow and hot-glued it to the side of the box. Finally, I applied a decorative sticker to the top of some of the boxes. If you glitter the lid of the box, you’ll probably need to adhere your holiday 3-D sticker with hot glue because the sticker itself won’t stick to the glitter.
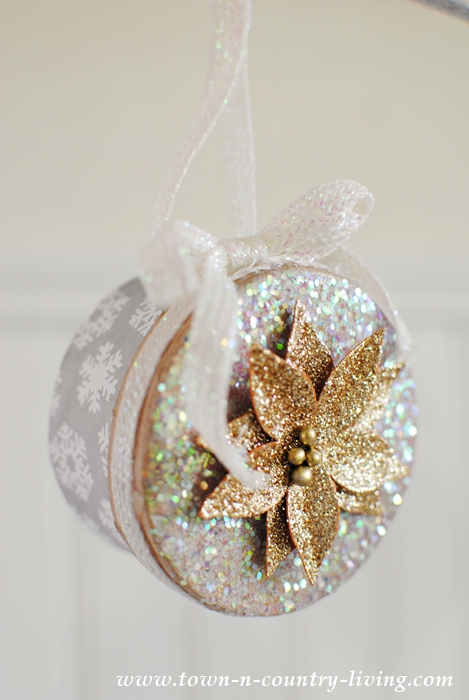
I found these glittery poinsettias at our local craft store. The hardest part of making these glittery ornaments is choosing the paper! There are so many pretty papers available at craft stores; it takes me forever to decide. It’s good thing hubby wasn’t with me.
They also had these festive little reindeer stick-ons. I painted the lids of some of the Mini Christmas Box Ornaments, and then glued glitter on top after the paint dried. I used a white chalk-style paint but you could use acrylic paint, too.

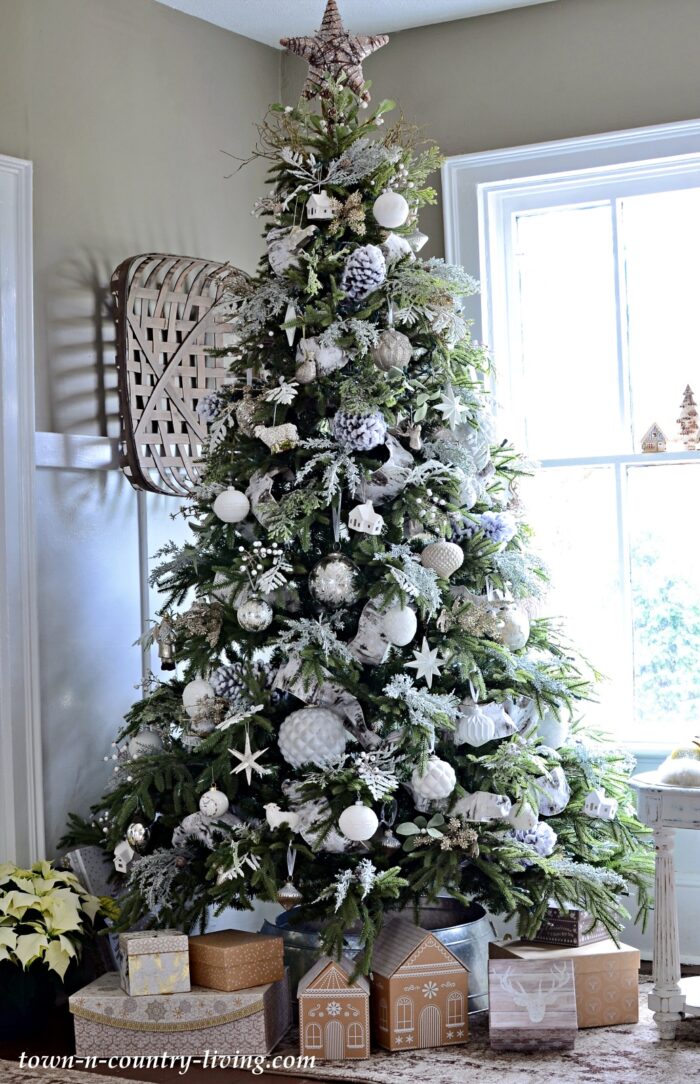
Making Christmas ornaments is always fun and puts me in the holiday spirit. In my opinion, it’s best to make them now (or even earlier in the year), so that you’re not scrambling at the last minute when you’re busy decorating the house or out shopping for Christmas gifts.
If you have small children and decide to make Mini Christmas Ornament Boxes, you might want to put small surprises inside the boxes. The kids will have so much fun opening them up to find a small treasure. I think I’m going to make more of them for an advent calendar … stay tuned!
Below you’ll find the links to the rest of the handmade ornaments, along with the dates those posts will be ready for you.
Here are all 31 Bloggers in order of their appearance:
Day 1 – The Silly Pearl :: Day 2 –Yesterday on Tuesday
Day 3 – Cupcakes and Crinoline :: Day 4 – An Extraordinary Day
Day 5 – Knick of Time :: Day 6 – Pet Scribbles :: Day 7 – Simply Kelly Designs
Day 8 – Town and Country Living :: Day 9 – Petticoat JUNKtion
Day 10 – The Everyday Home :: Day 11 – Up on Tippy Toes
Day 12 – Remodelando la Casa :: Day 13 – DIY 180 :: Day 14 – 504 Main
Day 15 – Sum of their Stories :: Day 16 – At Home with Jemma
Day 17 – The Kim Six Fix :: Day 18 – Shabby Art Boutique
Day 19 – Stone Gable Blog :: Day 20 – Morena’s Corner
Day 21 – My Uncommon Slice of Suburbia
Day 22 – Our Southern Home :: Day 23 – Domestically Speaking
Day 24 – The Crafting Nook :: Day 25 – Sweet Pea
Day 26 – Dukes and Duchesses :: Day 27 – Heathered Nest
Day 28 – Lovely Etc. :: Day 29 – Mod Podge Rocks
Day 30 – Running with a Glue Gun :: Day 31 – All Things Heart and Home
These are so cute.
These are lovely – glitter all the things!
These could be made from old gift boxes or packaging too, great idea, thanks.
Be still my heart! I love making things with these boxes, but you knocked it out of the proverbial park with this set of stunning ornaments! Wow!
These are beautiful, Jennifer! The glitter add such a magical touch.
I love this party. I’d love for you to come over and Link at the Fabulous Fall Link The Party!
http://mychristmasjourney.blogspot.com/2016/10/fabulous-fall-party-link-your-party.html
You can link every week!
Those little boxes are so cute. Thanks Jennifer.
Jen, you outdid yourself with this darling Christmas ornament. Making an advent calendar with these little boxes is a fabulous idea, too. Can’t wait to see what you create. 😉 Thanks so much for joining in the 31 days fun!
OH my goodness!!!!! I’m so in love with your project… It’s absolutely beautiful and i wish I had come up with that idea first LOL. I LOVE IT!!!!! I’ll try to make some for our christmas tree…. What an inspiration!!!
LOVE LOVE LOVE!!!!!!
Hugs Cami
What a sweet idea, Jennifer! Lovely ornaments!
These ornaments are so very pretty! When your Christmas tree lights twinkle around them this December you are going to really enjoy them.
such a wonderful ornament…I’d love to make a few! ox
Awwww I love how tiny and petite they are. You truly could make these for any style you needed. Love them.
Absolutely gorgeous!
I love all the details that you added to make these ornaments just gorgeous!
These are gorgeous!!
These are adorable Jennifer and the variation possibilities are endless. Love this handmade project for Christmas and have pinned to my Handmade Christmas board.
Oh my goodness! The sweetness factor is off the charts! I LOVE these 🙂 🙂
These are too cute for words!!!! I LOOOVE them!!
These are absolutely gorgeous! I LOVE the sparkle!